How to Create an Audio Survey
The following guide will walk you through the easy step-by-step process of creating a new audio survey and utilizing the various survey features.
What Is An Audio Survey?
Audio surveys, sometimes called voice surveys or asynchronous interviews, refers to any survey where the respondent can answer questions by speaking into their microphone. Phonic allows a recorder to stand alone or supplement a more traditional survey question type. For a list of supported question types see Question Types.
Step 1: Create Survey
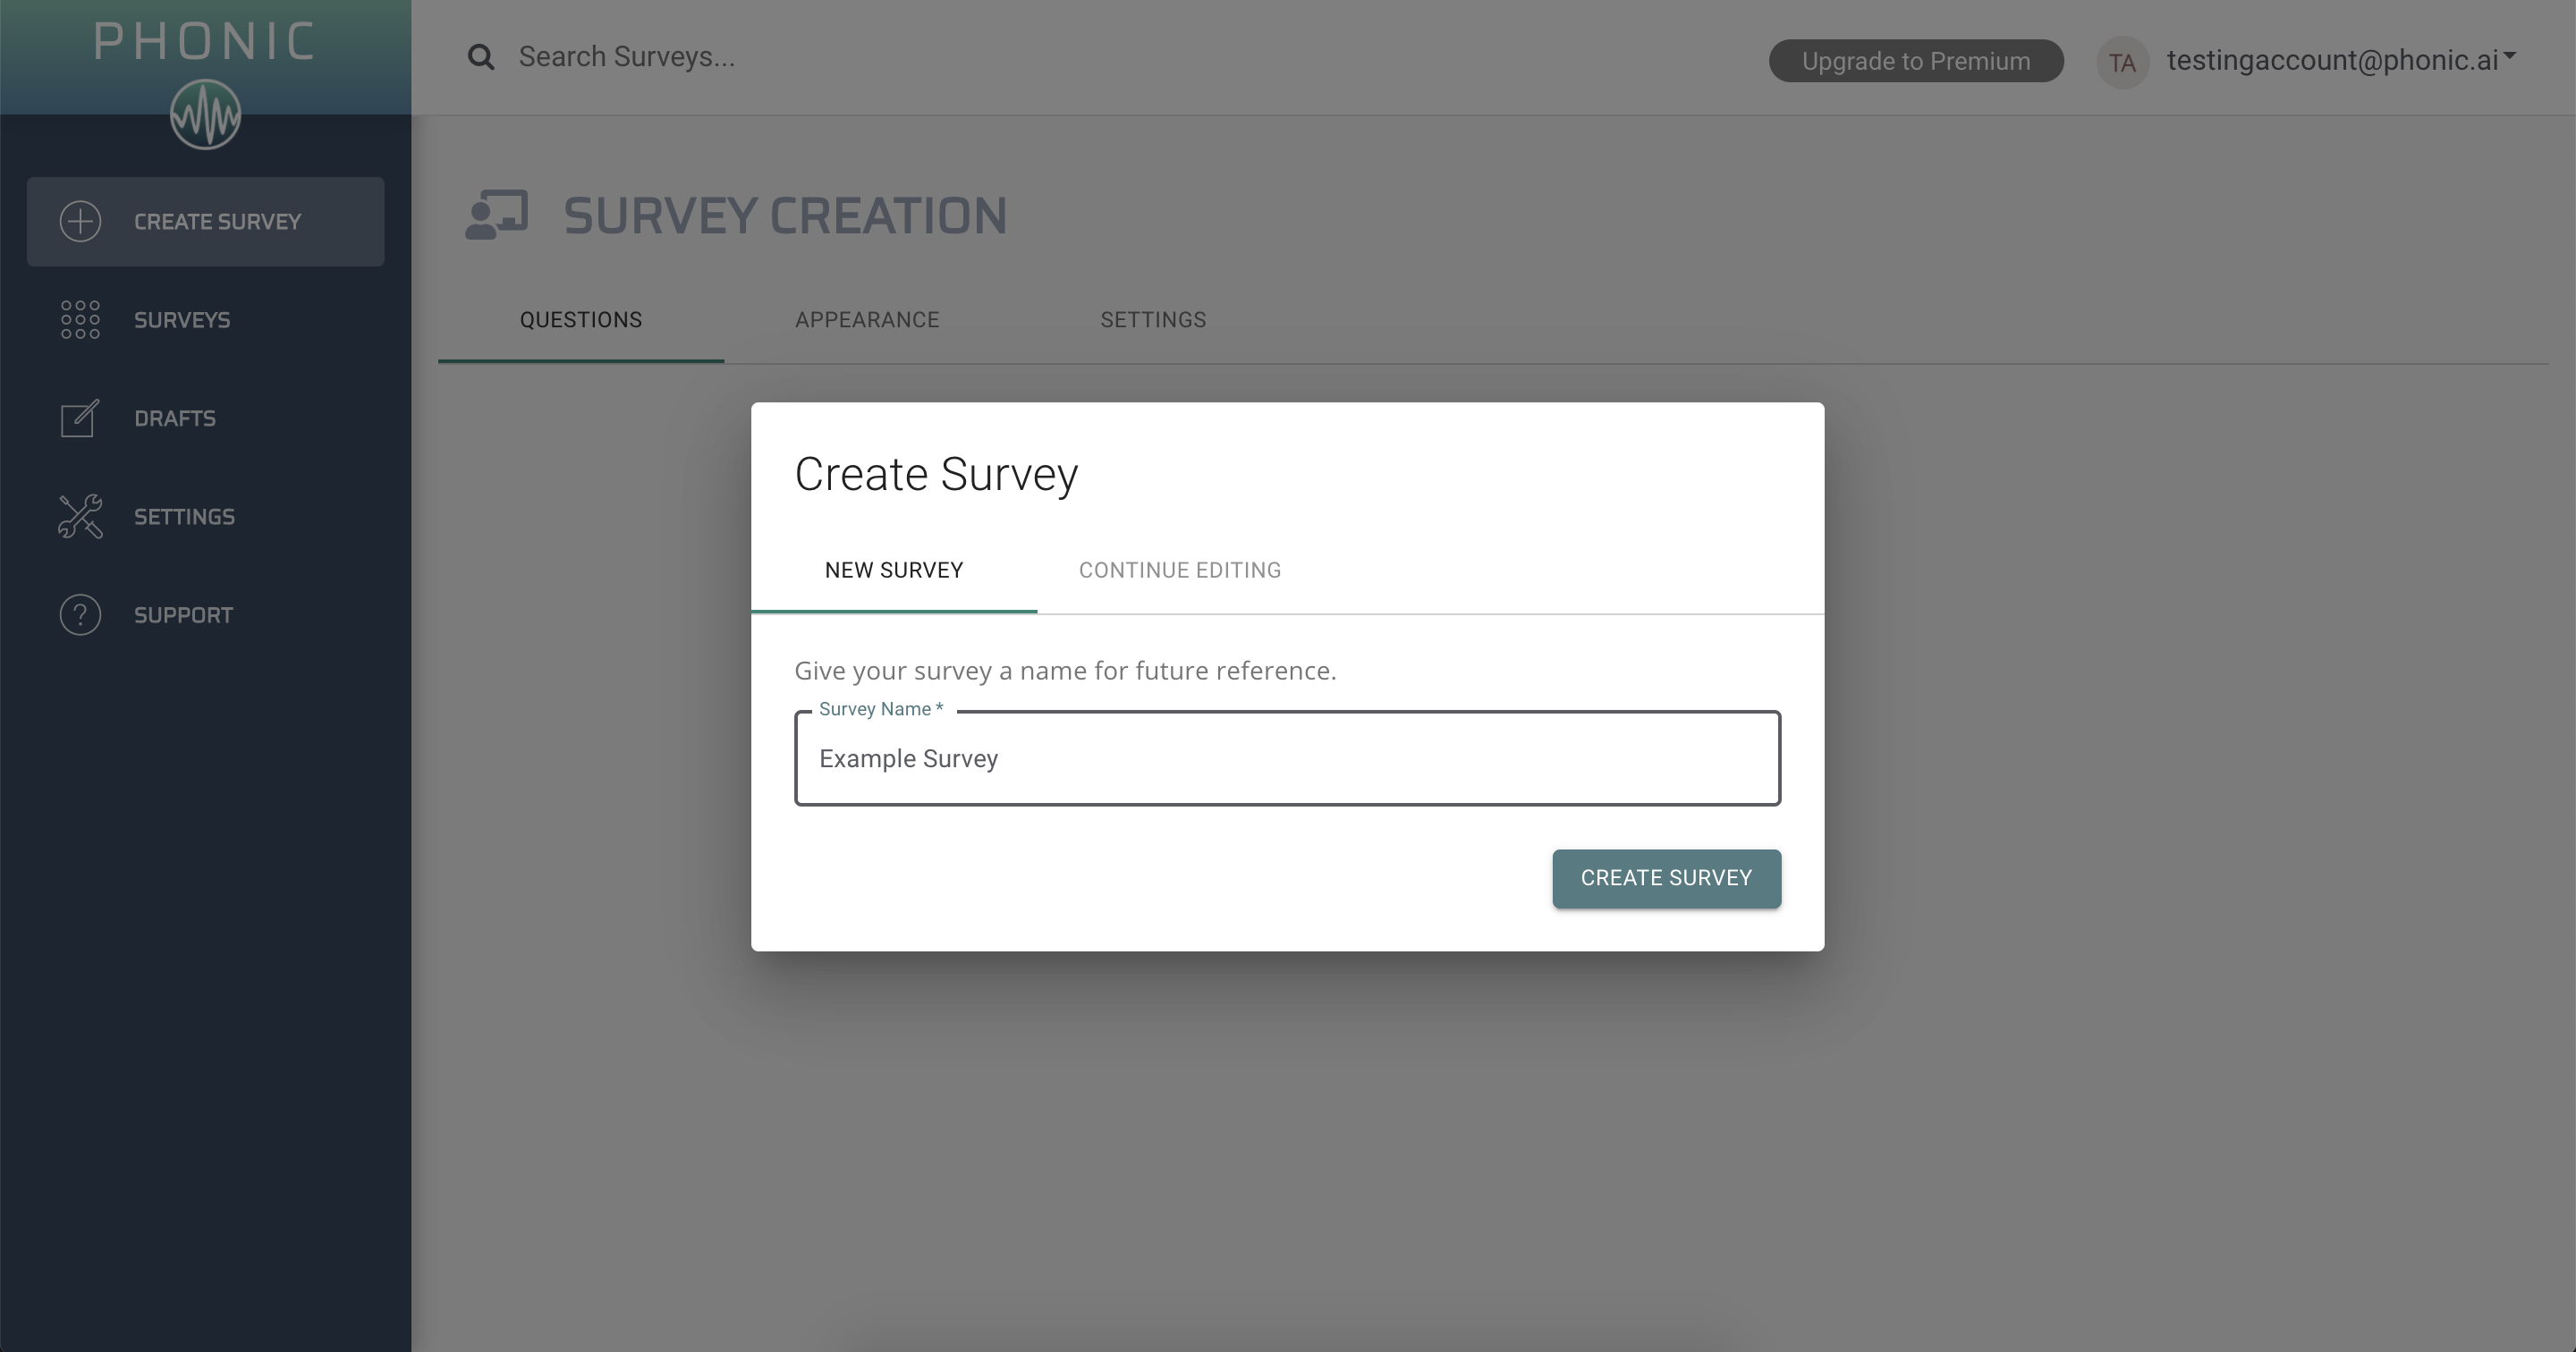
If you haven't already, create your phonic account here. After logging in, you can create a new survey by either clicking “Create Survey” on the left hand toolbar or the “New Survey” tile. You will be prompted to enter a Survey Name which will be used to refer to your survey going forwards.
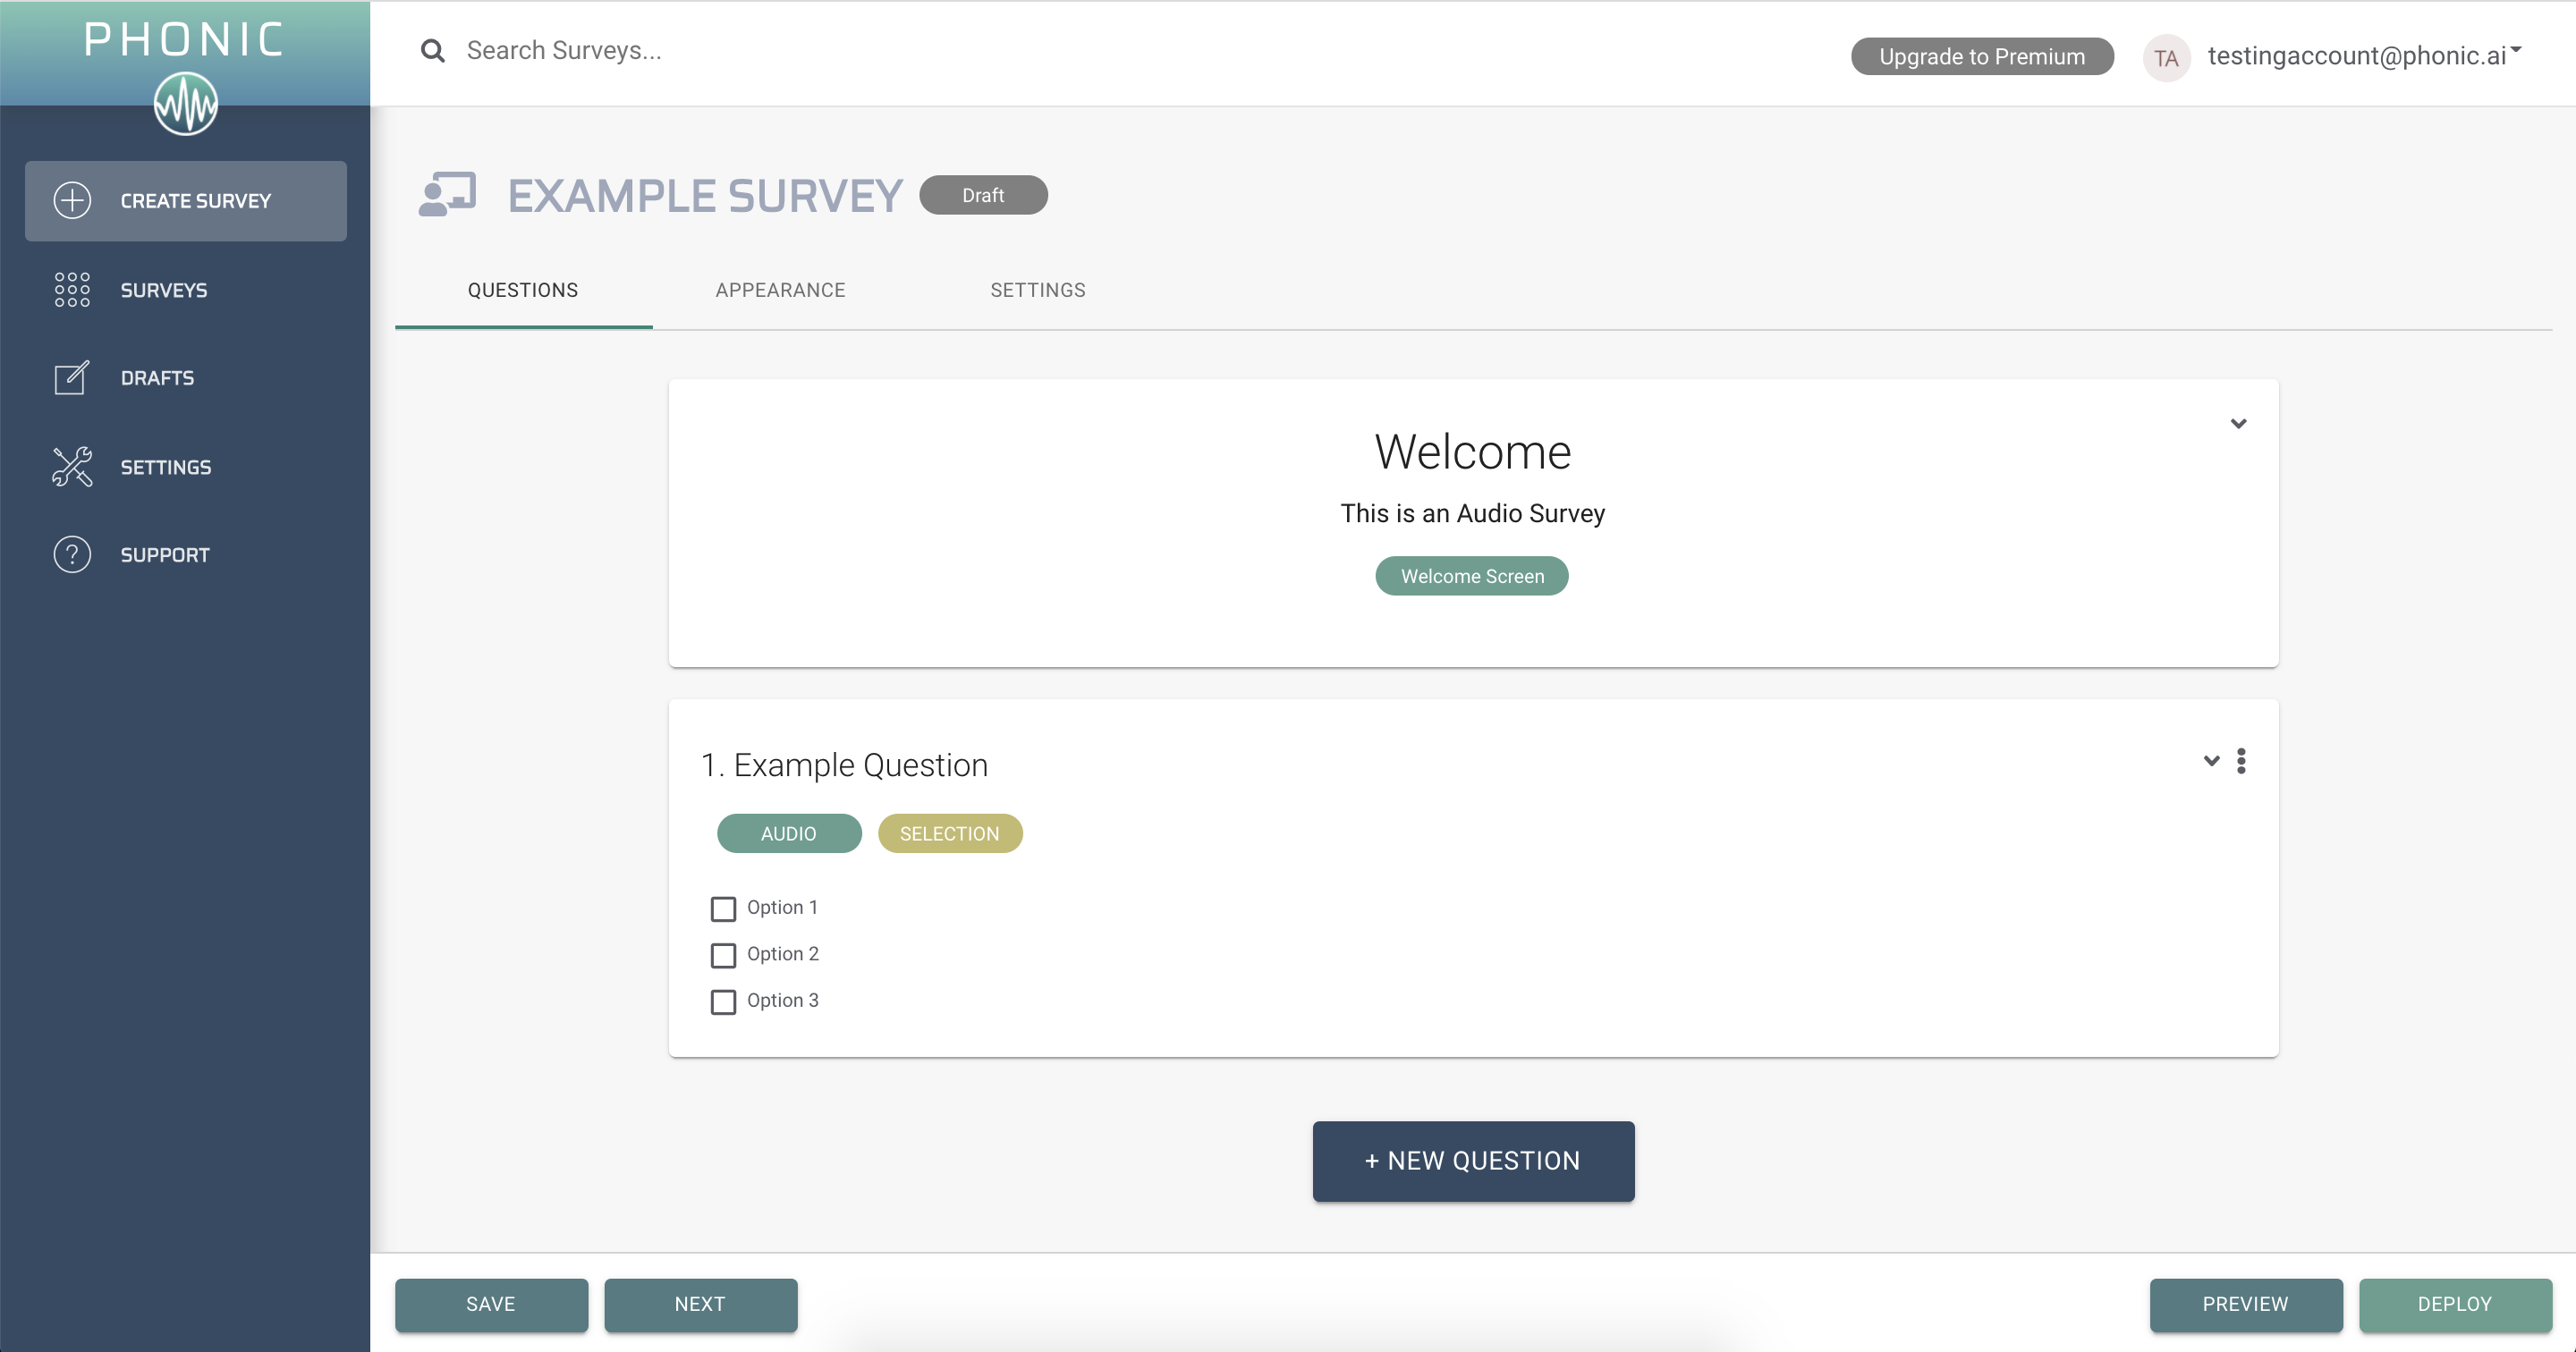
Step 2: Add Questions
Enter your question in the text box provided. You may check off whichever features you wish to apply to the question you are asking. Features include the option to enable computer transcription and sentiment analysis. You may also choose to make the question optional or add a time requirement.
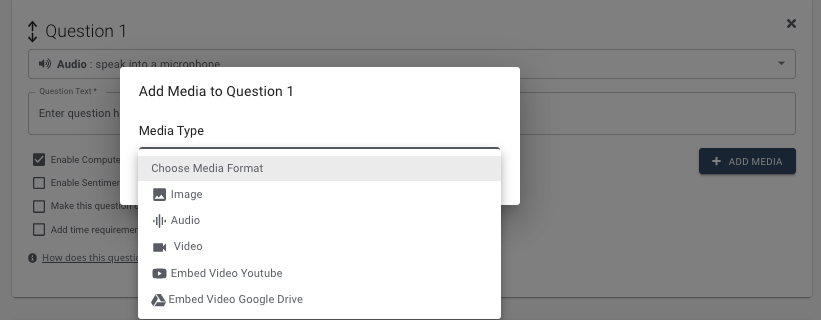
Another feature includes uploading media as part of your question. Clicking the add media option will allow you to select which media type you wish to include. Use the drop down arrow to select between an image, audio, video, youtube or google drive file.
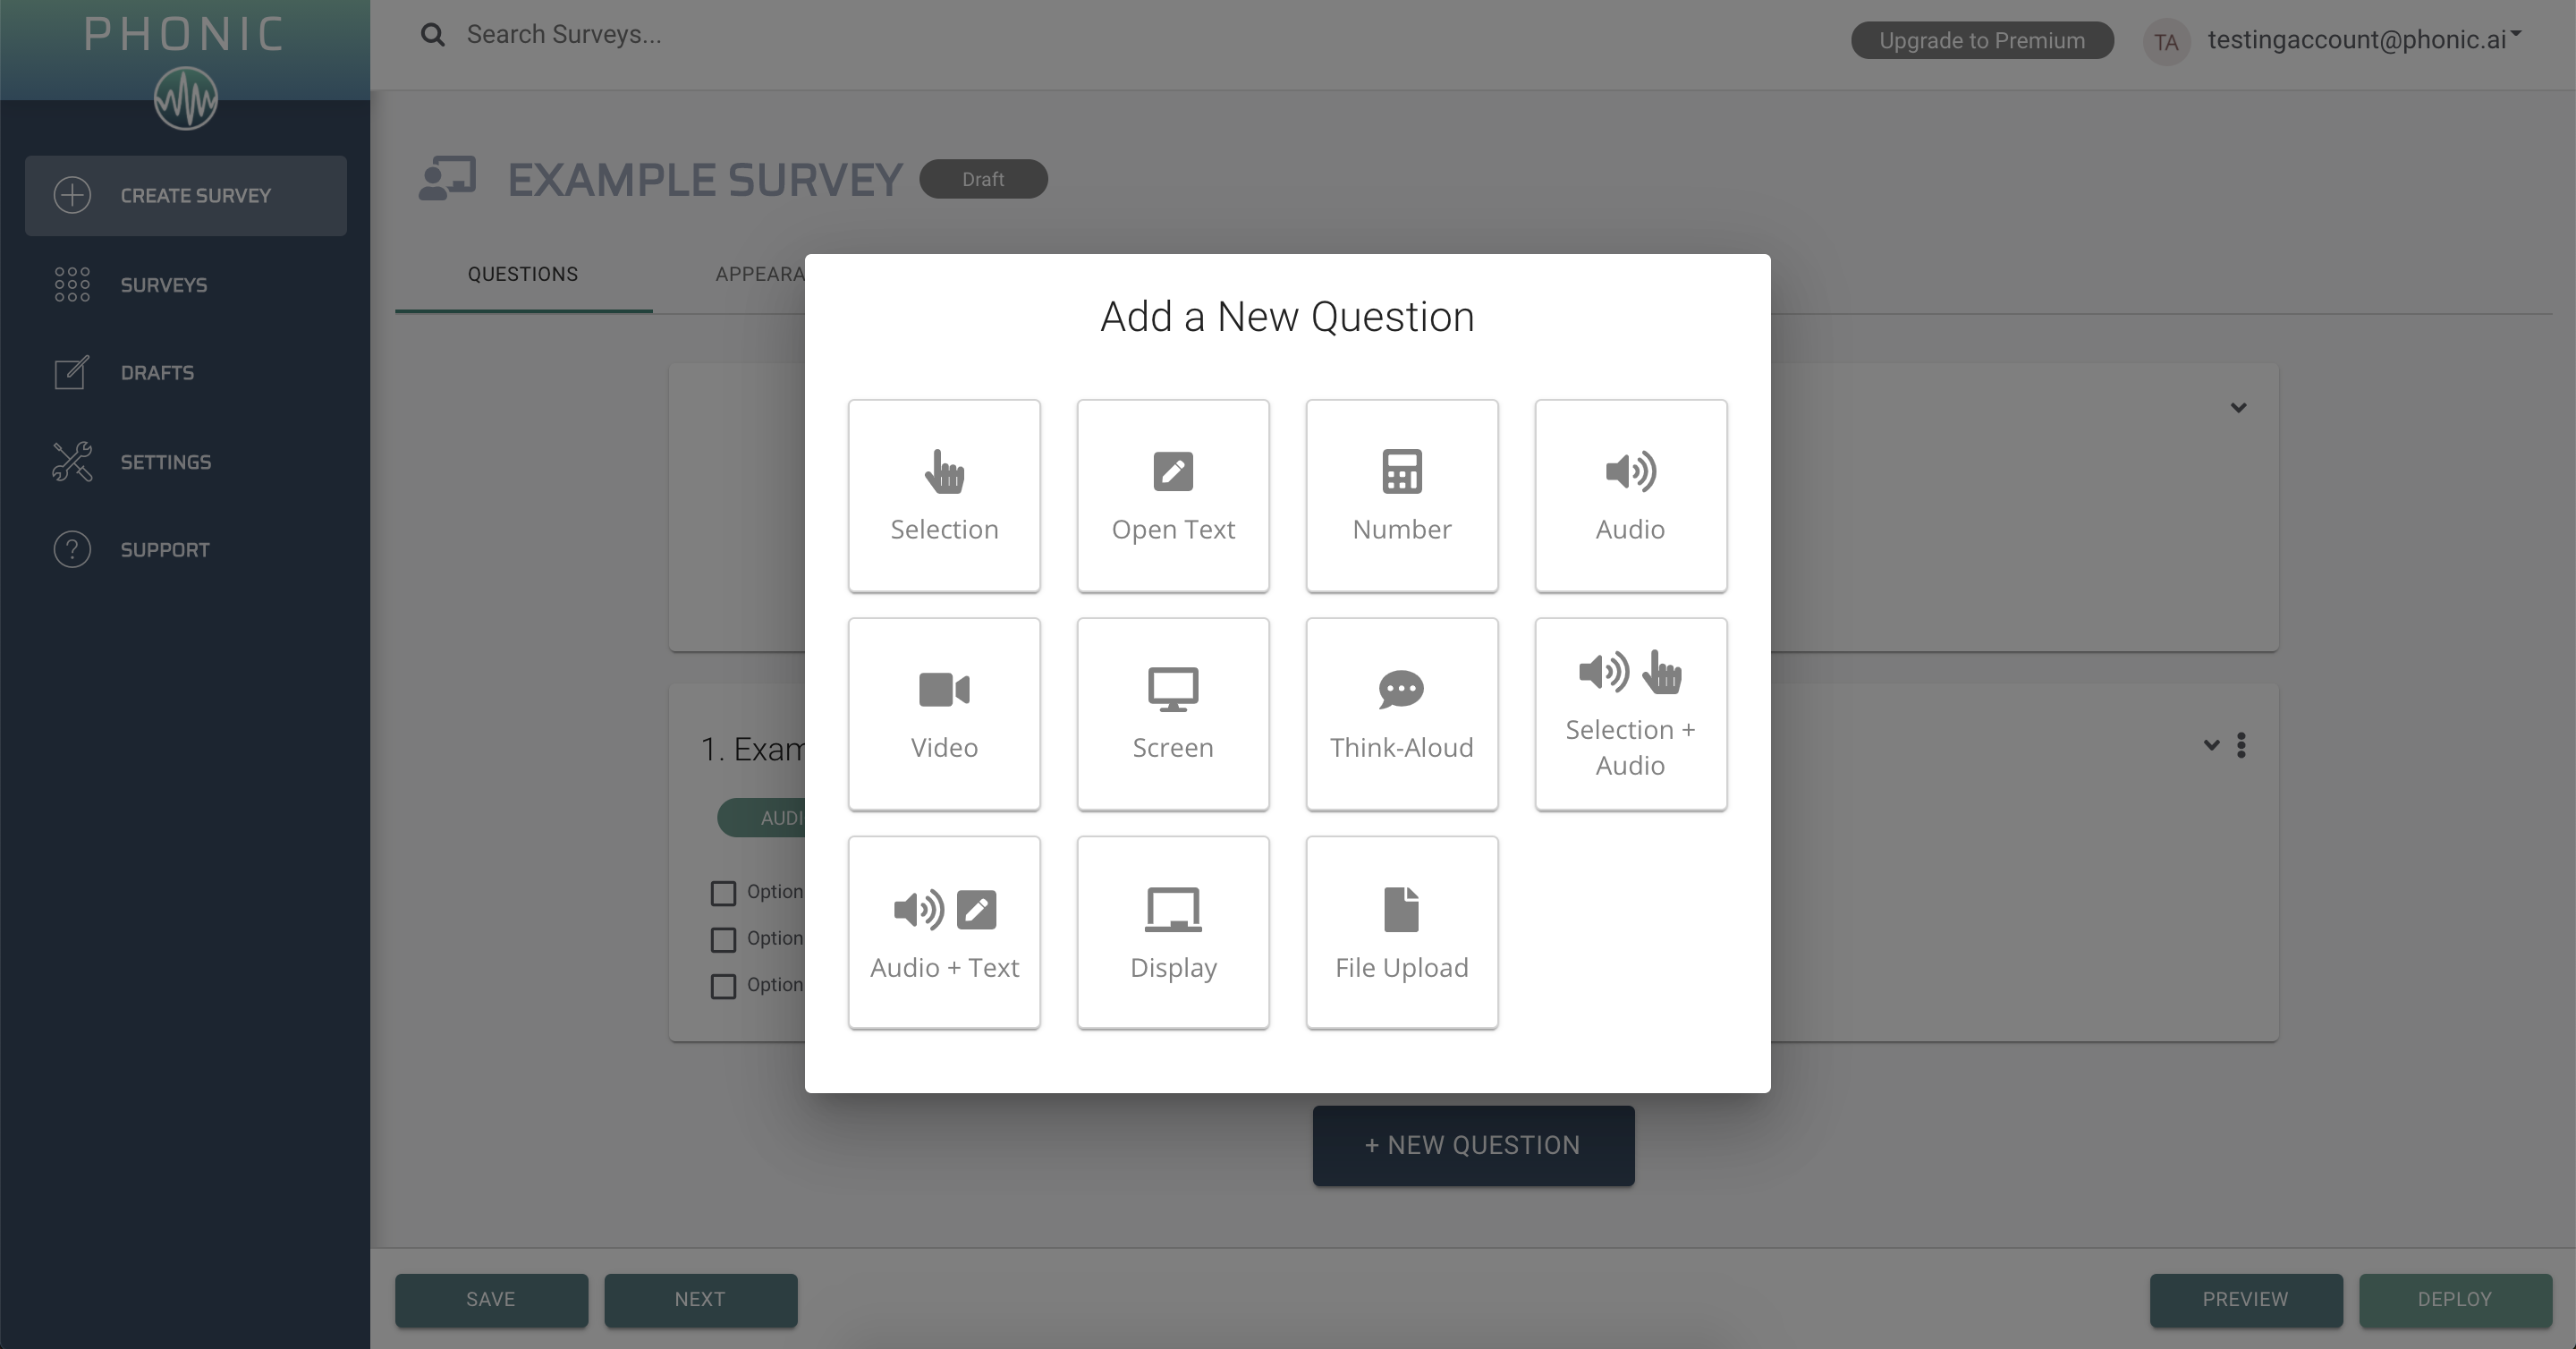
You also have the ability to customize the question response type. This will determine how respondents answer the question. Use the drop down arrow to select between six different response options. For more information on what question types are available, see Question Types. To see how your question and response option will appear to respondents, click on How does this question appear?
When you are satisfied with your question format, you may continue to add the remainder of your survey questions using the Add Question button. Remember that you can customize each individual question and response type! When you are done adding all your survey questions, select save and next in the button left corner.
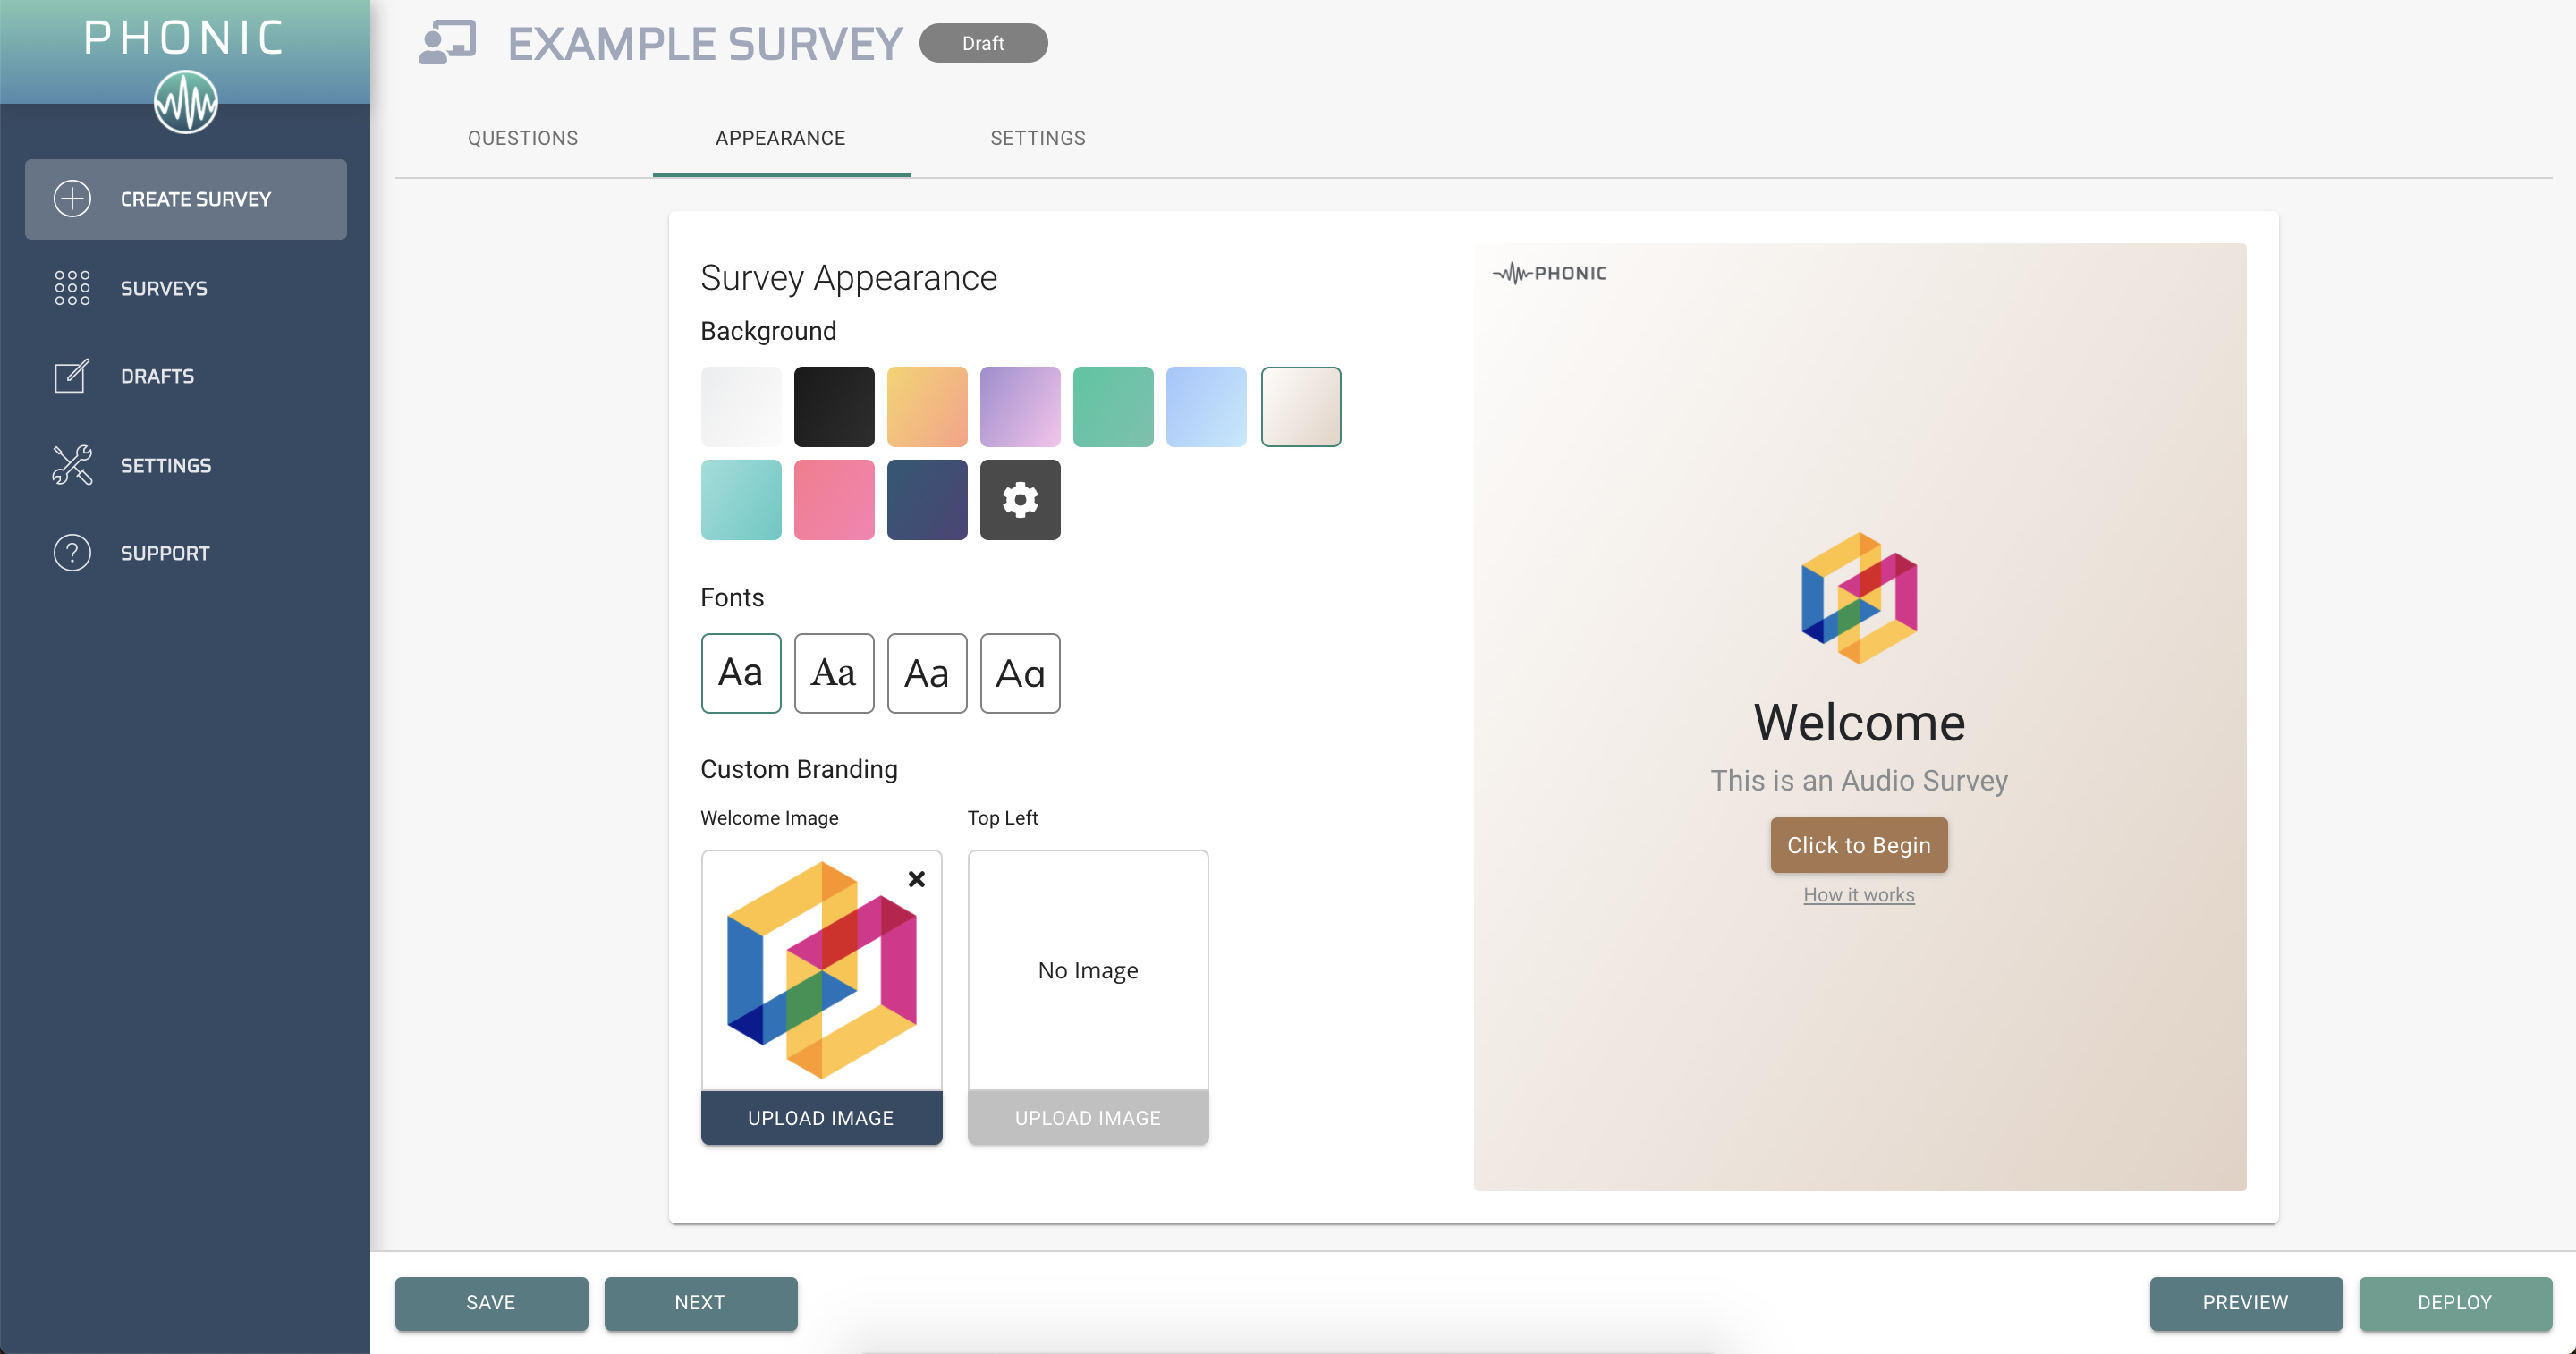
Step 3: Appearance
The appearance tab allows you to modify the appearance of your survey. This includes changing the background colour, font and including images and custom branding. This custom branding is optional.
Step 4: Settings
The following page will give you the option to add titles and instructions. Additional features under settings include demographics, microphone check, language and completion link.
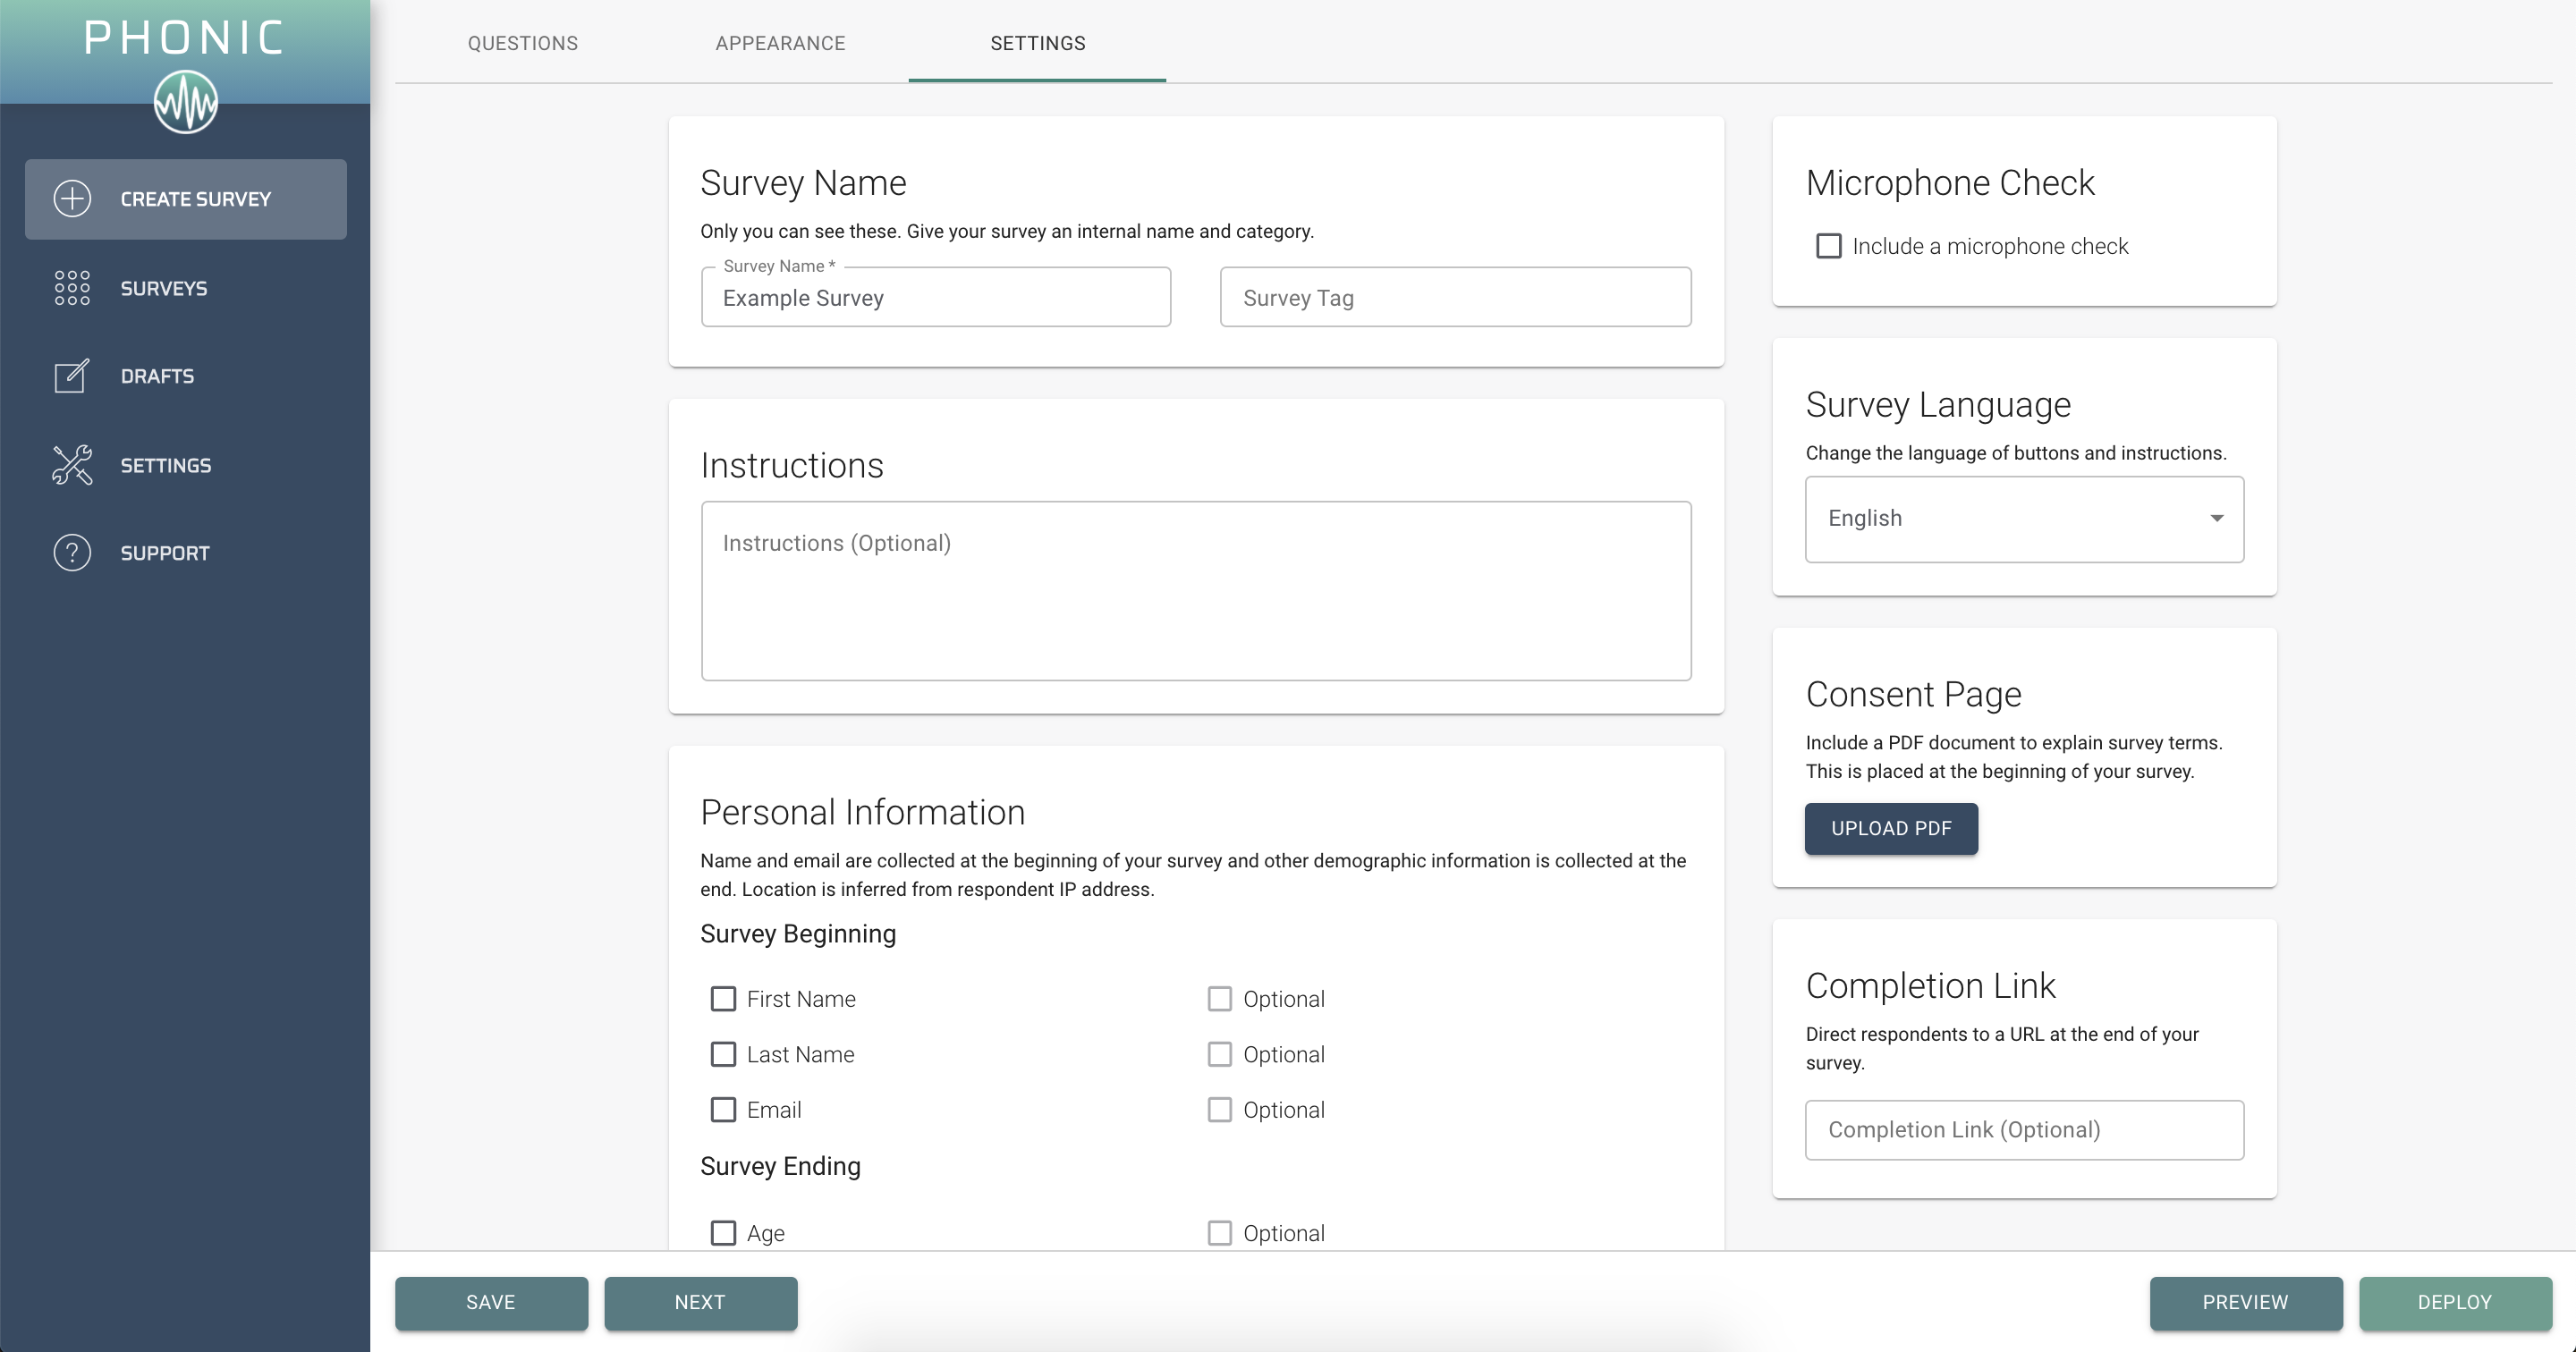
Completion Link: Directs respondents to a URL at the end of the survey.
Personal Information: If selected, demographic questions will appear either at the beginning or end of the survey.
Microphone Check: Adds a screen to the beginning of the survey allowing users to test their microphone before they begin.
Survey Language: Changes the language of all survey buttons and instructions.
Consent Page: Upload a document describing respondent data release. Appears at the beginning of your survey.
Step 5: Preview and Deploy
Once you are finished, you can preview your survey using the preview option in the bottom right corner. This will allow you to click through your survey and see exactly how it will appear to respondents. If you are happy with the final product, you can go forward and deploy your survey using the deploy button in the bottom right corner.
Congrats, you have successfully launched your first Phonic survey! See our Analytics page to learn more about analyzing your survey data after it is collected.